Session Screen Overview (web)
The Session Screen displays all the animals that were scanned, imported or bulk uploaded into StockMate in a selected Session. Other Session related information can been viewed, added or edited from this screen.
Accessing the Session Screen
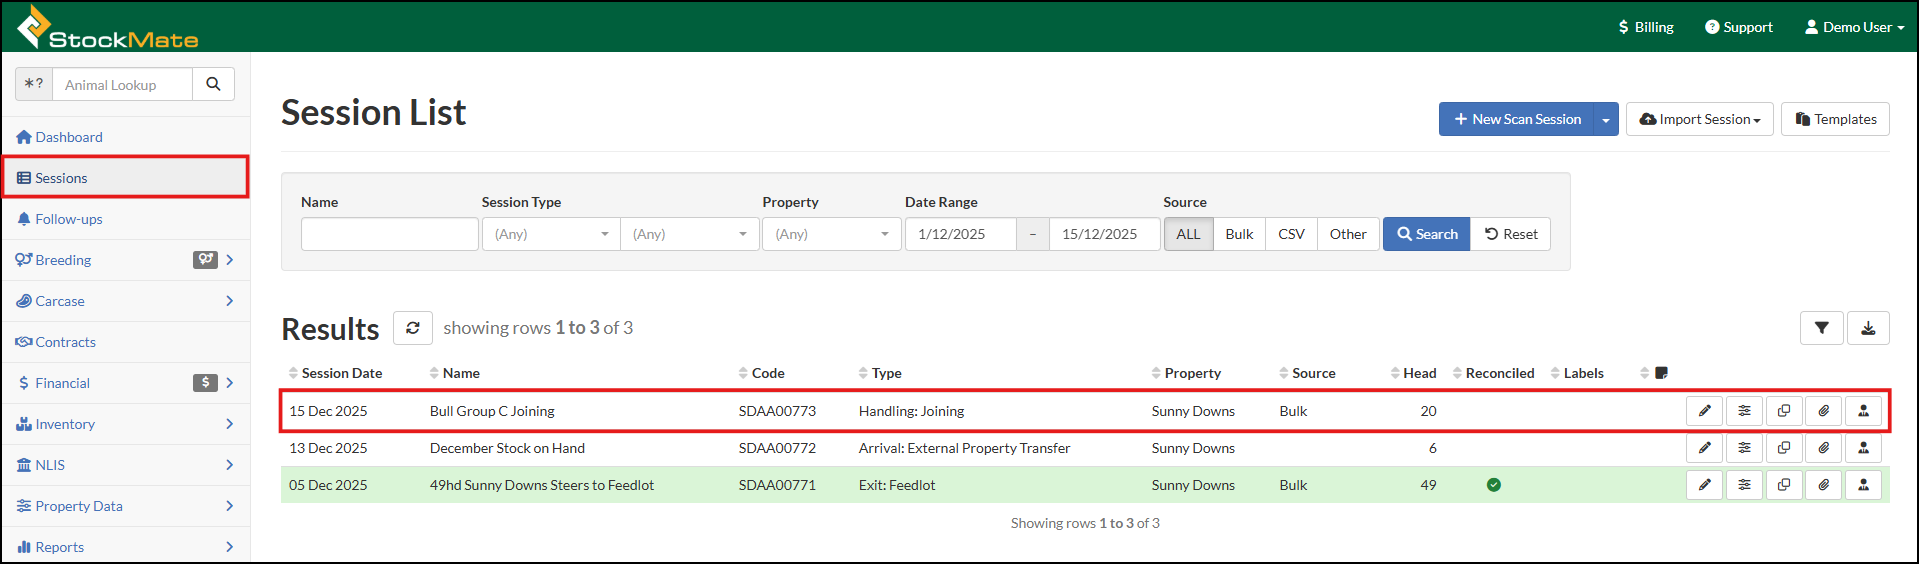
Select Sessions.
In the Results section of the screen select the relevant Session that you would like to view.
For instructions on how to search for a particular Session, refer to Session List Screen Overview (web).
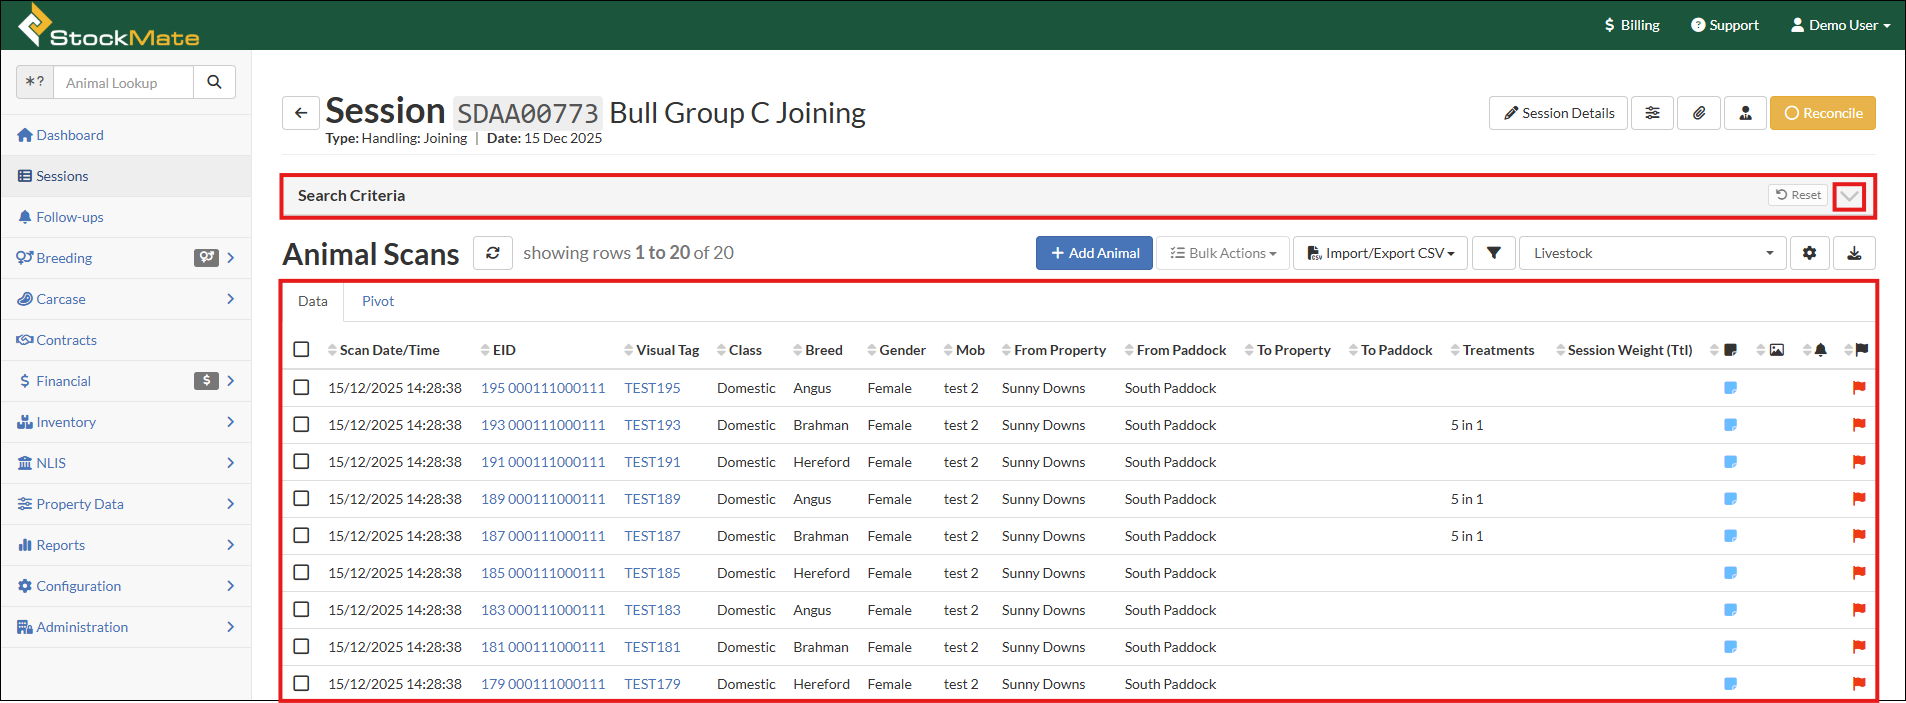
Search Criteria and Animal Scans Results
The Animal Scans section on the Session screen displays all the animals in that Session.
The information displayed will be based on the type of Session and also the report configuration selected.
To narrow the search for a particular animal, select  in the Search Criteria section.
Input the search criteria, select to reload the Animal Scans.
Input the search criteria, select

Useful for using in conjunction with Bulk Edit and Export Scans to CSV from selected Scans through Bulk Actions - See further details below under Bulk Actions.
In the Animal Scans section:
- Select
to filter animals by EID or Visual Tag.
- Select
to download to CSV, data displayed in the Animal Scans section.
- Select the Report Configuration from the drop-down list or select
to edit the selected report configuration.
Refer to Report Configurations for further details on using this functionality. - Select Pivot to display the results as a chart.
Report Pivots provides detailed instructions on creating charts in StockMate.
Add Animal
Select + Add Animal to add an animal to the selected Session.
Refer to Create New Session – Scan Session (web) for detailed instructions on using this functionality.

Bulk Actions
The Bulk Actions drop-down menu contains a range of actions that can be completed using selected scans.
Edit
When an amendment needs to be applied to several animals in a Session, select the required animal records, then select Bulk Actions, Edit.
Refer to Edit Existing Session – using Bulk Edit (web) for further information on using this functionality.

The EID field must be visible in the report configuration to select animals.
Add Follow-ups
When a Follow-up needs to be added to several animals in a session, select the animal records, select Bulk Actions, Add Follow-ups.
When this action is applied to animals on the Animal Scans screen, the Session Code they were selected from will also be recorded against the Follow-up.
This function can be accessed from reports that return a single report line per animal e.g. Animal Scans, Livestock, Forecast and Financial Reports. The EID field must be visible in the report configuration to select animals.
Add to Joining Plan
To add selected animals to a Joining Plan, select the animals, select Bulk Actions, Add to Joining Plan.
Any male animals will be excluded as StockMate does not allow Joining Plans to be applied to them.
Refer to Joining Plan View and report (web) for further details.
Any male animals will be excluded as StockMate does not allow Joining Plans to be applied to them.
Refer to Joining Plan View and report (web) for further details.
Subscription to the Breeding Module is required to access this functionality.
Bulk Add Joining Plans can be accessed from some reports that return a single report line per animal e.g., Animal Scans, Livestock, Forecast and Financial Reports.
The EID field must be visible in the report configuration to select animals.
Bulk Sessions
A Bulk Arrival/Handling/Exit Session can be created using existing animals in a scan session. Select the required animal records, then select Bulk Actions, Create Arrival Session/Create Handling Session/Create Exit Session.
The animals will remain in the original session. Refer to Create New Session - Bulk Session from Selected Scans (web) for further information on using this functionality.
Copy EIDs
This feature enables users to copy selected EIDs to their computer's clipboard ready to paste.
This function can be accessed from some reports that return a single report line per animal e.g., Animal Scans, Livestock, Forecast and Financial Reports. The EID field must be visible in the report configuration to select animals.
To copy EIDs, select the required animals, then select Bulk Actions, Copy EIDs.
Export Scans/Treatments to CSV
The Bulk Export Scans/Treatments to CSV option enables users to export information for selected animals. Select the required report configuration to display the necessary fields.
The EID field must be visible in the Report Configuration to select animals.
To export the data, select the required animal records, Bulk Actions, Export Scans to CSV or Export Treatments to CSV.

The Bulk Action Export to CSV functionality will export a maximum of 1000 animals. To export more than 1000 animals, select Import/Export CSV instead.
Import/Export CSV
Where multiple fields in a Session need to be changed, the existing data would need to be exported as a CSV, updated and then imported back into StockMate.
When editing or updating existing sessions, it is recommended to Export the existing session data first, then amend/update the file, save changes and then re-import the data into StockMate. This will ensure that existing data does not get over-written or removed.
Refer to Edit Existing Session – using Import/Export CSV (web) for detailed instructions on using this functionality.

Session Details
Select Session Details to view, add or edit further details about the selected Session.

Session Setup
Select  to view the Session Setup and the defaults that were selected for the Session.
The Session Setup may be edited and saved as a new Template if desired.

For further information and detailed instruction on setting up Session defaults, refer to Session Templates (web).
Session Documents
Select  to view any documents attached to the Session.

Select + Add Document to attach a new document to the Session.

Input the name of the document, select Browse to locate the file, Save.
Session Services
Select  to view the Services attached to the Session.

To add additional services, select + Add Services.

Input the required details, Save.
The drop-down list in the Type field is pre-populated and cannot be edited by the user.
To add or edit the contents in the Contact drop-down list, refer to Setup Contacts (web & app).
Reconcile
Once the details of the animals in the Session have been checked, select Reconcile to reconcile the Session.
Once a session has been reconciled it is unable to be edited further. Only an Administrator can un-reconcile a session, if further editing is required.

Once a session has been reconciled it is unable to be edited further. Only an Administrator can un-reconcile a session, if further editing is required.